Installing In macOS - Service
Method 1: PKG.
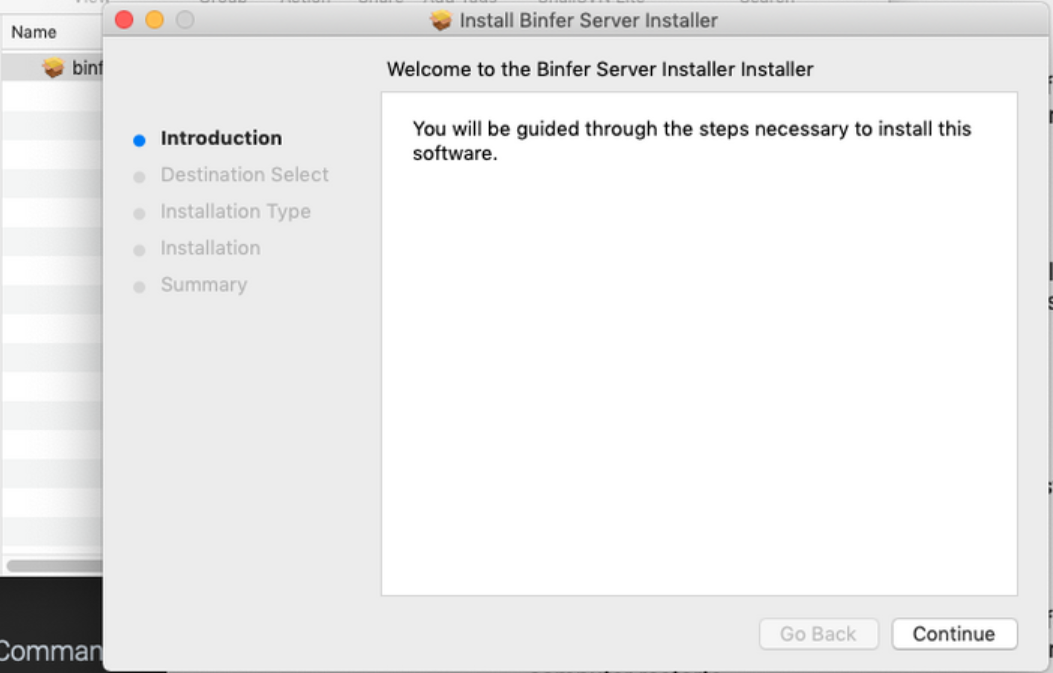
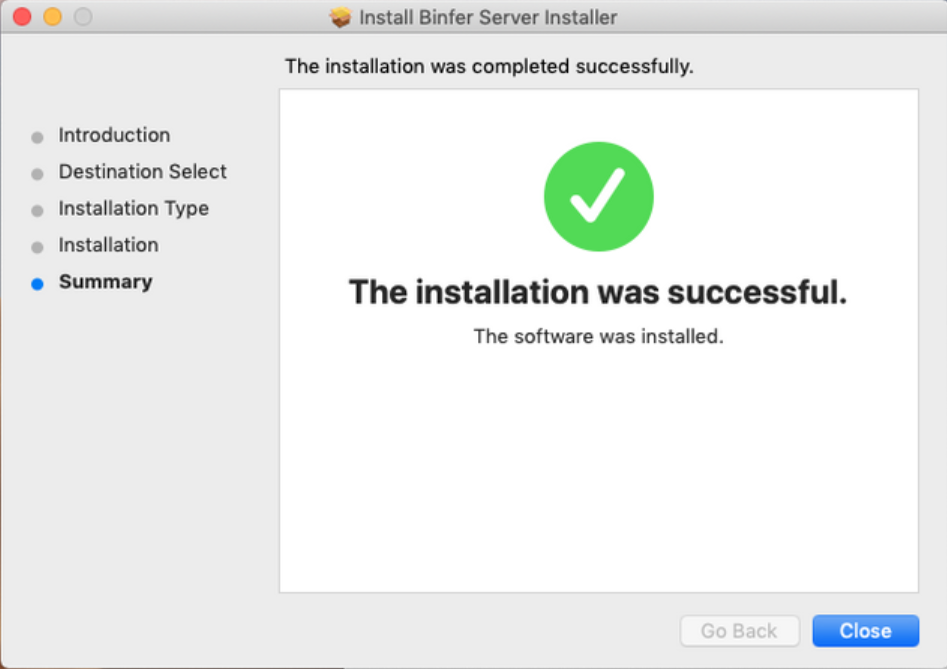
- Download 'macOS service - server/client - PKG'.
- Double click the downloaded installer
- Follow the instructions and complete the installation
- Continue with First time setup.
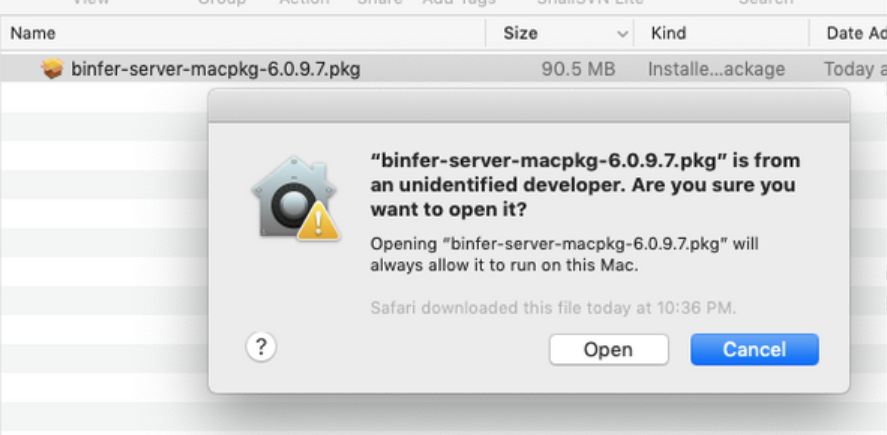
If you get a warning about "unidentified developer", then that means that we have not signed up with the developer program. We are releasing this product from our website directly instead of their app store. As you are already downloading it directly from our website, it is the original version and has not been tampered with by any third party.
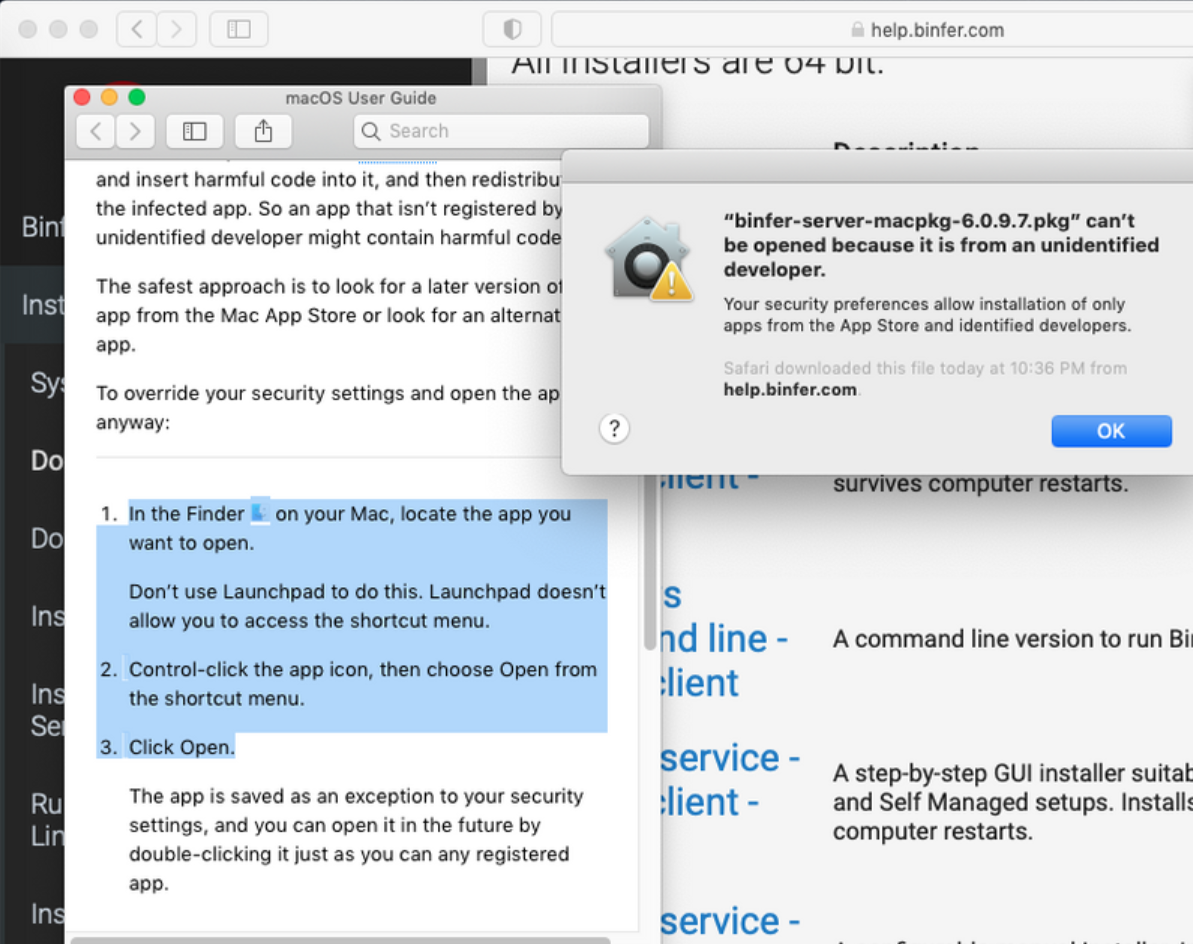
Follow the steps as shown, to install Binfer.
Method 2: ZIP.
- Download 'macOS service - server/client - ZIP'.
- Open Finder and click on Applications.
- Extract the zip file under Applications. A folder named binfer-server should be seen.
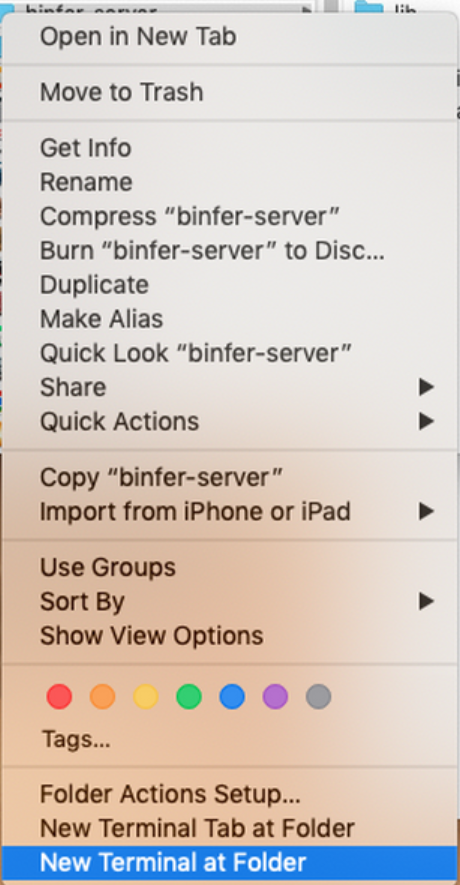
- If the default port of 1212 is acceptable, then open the folder location in a terminal. Otherwise, change the port before continuing.
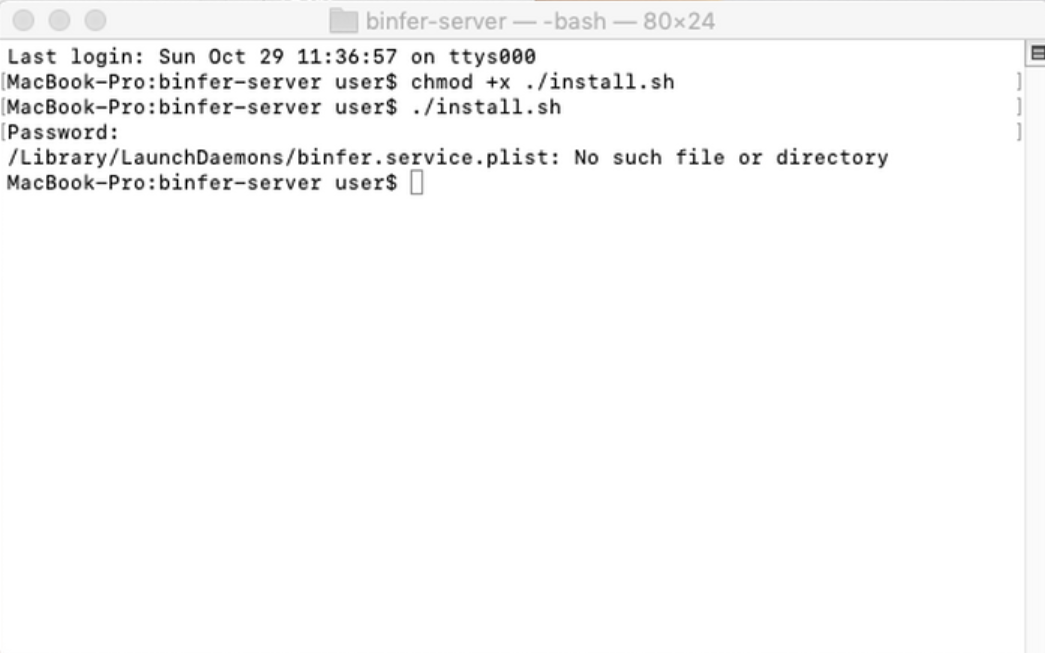
- Make install.sh executable by typing the command chmod +x install.sh.
- Type sudo ./install.sh, enter the admin password if prompted, and press enter. Binfer will get installed as a service.
- Grant permissions if prompted by any firewall/antivirus system.
- Default browser should open. "Welcome to Binfer setup" screen should be displayed. If this did not happen, then open your favorite web browser and open this link: "http://127.0.0.1:1212/b6/config". If the port was changed, then replace 1212 with the changed port number.
- Continue with First time setup.

To change the default port of 1212
- Open the file startBinfer.sh in a text editor.
- Change the port number if the default is not acceptable: HTTPPORT=1212. Save and close the file when done.
- Continue with step 3 from the previous section.
To run in command line
- Make startBinfer.sh executable by opening a terminal and typing the command chmod +x startBinfer.sh.
- Type ./startBinfer.sh, and press enter.
Grant Binfer access to files via System Preferences
If you are unable to see any files or receive any files then follow the steps to allow Binfer access to files.
- Open System Preferences: Click on the Apple menu in the top-left corner of the screen, then select "System Preferences."
- Security & Privacy: Click on the "Security & Privacy" icon.
- Privacy Tab: Navigate to the "Privacy" tab.
- Unlock for Changes: Click the lock icon in the bottom-left corner to make changes. Users will need to enter their administrator password.
- Full Disk Access: From the sidebar, select "Full Disk Access."
- Add Binfer Application:
- Click the "+" button under the list of applications that have Full Disk Access.
- Navigate to Binfer application.
- Select it and click "Open" to add it to the list. The path is Applications > binfer-server > jre > Contents > Home > bin > java.
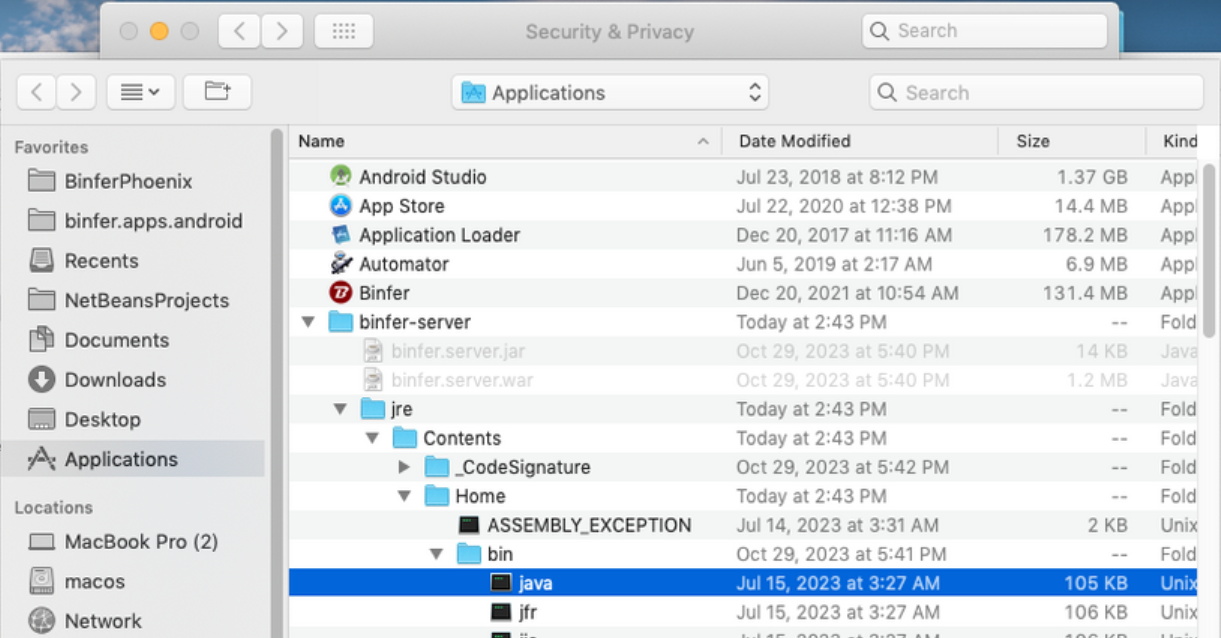
- The java file that runs Binfer will be added
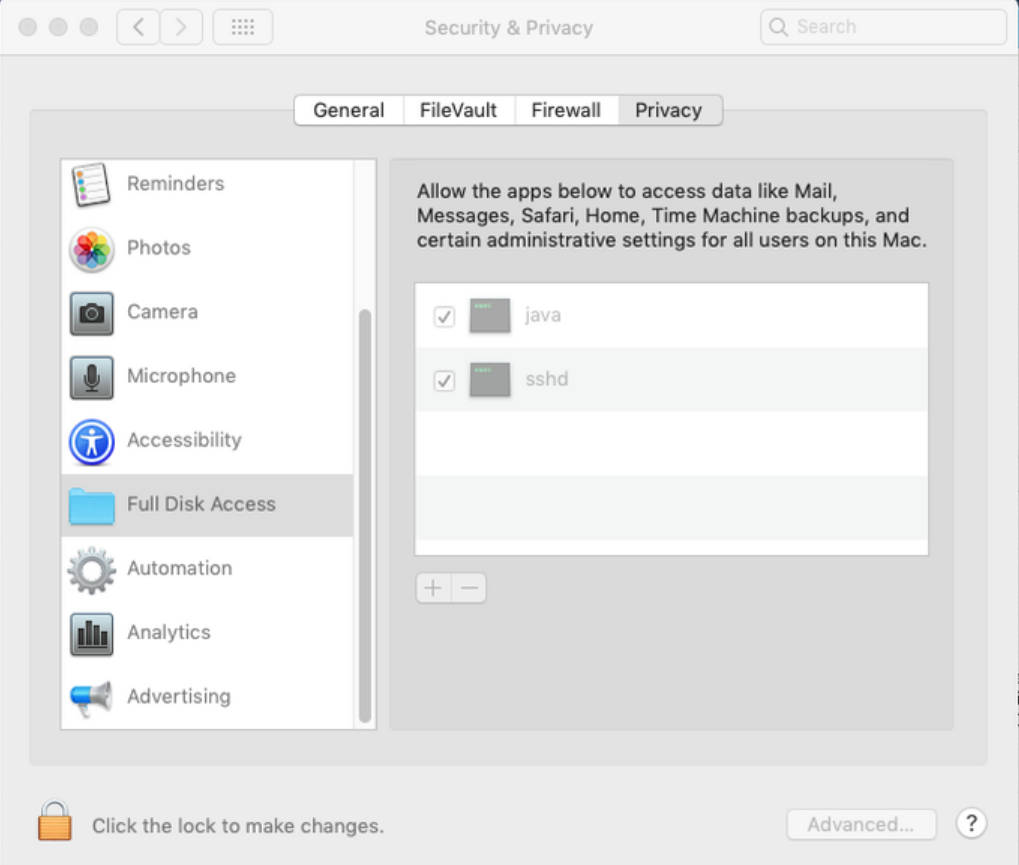
- Lock to Save Changes: Click the lock icon again to prevent further changes.
Specific Folders Access
For specific folders like Documents, Desktop, and Downloads:
- Follow steps 1 through 4 above to open the "Privacy" tab and unlock for changes.
- Select the Appropriate Category: In the sidebar, select the category that you want to grant access to (e.g., "Files and Folders" for more specific access).
- Add Binfer application (Step 6 above): Similar to Full Disk Access, add the Binfer application as needed.